DIY Modern Floating House Numbers
When we painted our house, we thought it was a good time to also make some other updates to our curb appeal while we were at it, and one of our big priorities was replacing the old house numbers. What we had before was an engraved metal plaque, like this. It was good with our old paint colors, but the color and style didn’t really go with the new paint job. We thought it would be fun to do floating numbers that have a modern, crisp look.
We love the way black looks with our grey house, like on our mailbox and front door light, so we chose these 5-inch black numbers by Hillman at Lowe’s. The simple font is exactly what we wanted … except these things have pretty bad reviews. Lots of reviewers complained that the screws broke during installation, but we decided to take our chances anyway.
The first step was figuring out how wide we wanted everything to be. Each number comes with a template that is meant to show how big the numbers will be, and then where you should drill the hole in the wall to line up the screws. Below is a portion of our address and the template lined up below the actual numbers. Once we figured out exactly how wide we wanted all the numbers to be, we taped all the templates together to get one long strip. Taping them all together makes sure they don’t shift around, relative to each other, when you’re moving them to their final placement.
At first we didn’t really see what all the fuss was about with the bad reviews. Sure these weren’t the greatest things we’ve ever seen, but the screws didn’t seem cheap or easily breakable. We couldn’t figure out what these people were doing that was causing all the breaking problems. That is, until we placed the actual numbers on top of the templates. Each template comes with three spots where you’re supposed to drill. The problem is, if you line up your numbers over the templates, the screws did not match up with the template holes. Sometimes they were close, and sometimes they were pretty far off. You might have one or two template holes match up with the actual screws, but we didn’t have a single number where all three holes matched correctly.
We circled where each screw ACTUALLY should go, and modified the template a bit. Without doing this, we could see how people might try to force the screws into the templated spots, and end up breaking them. In that picture above, you can see how far off some of the template holes were.
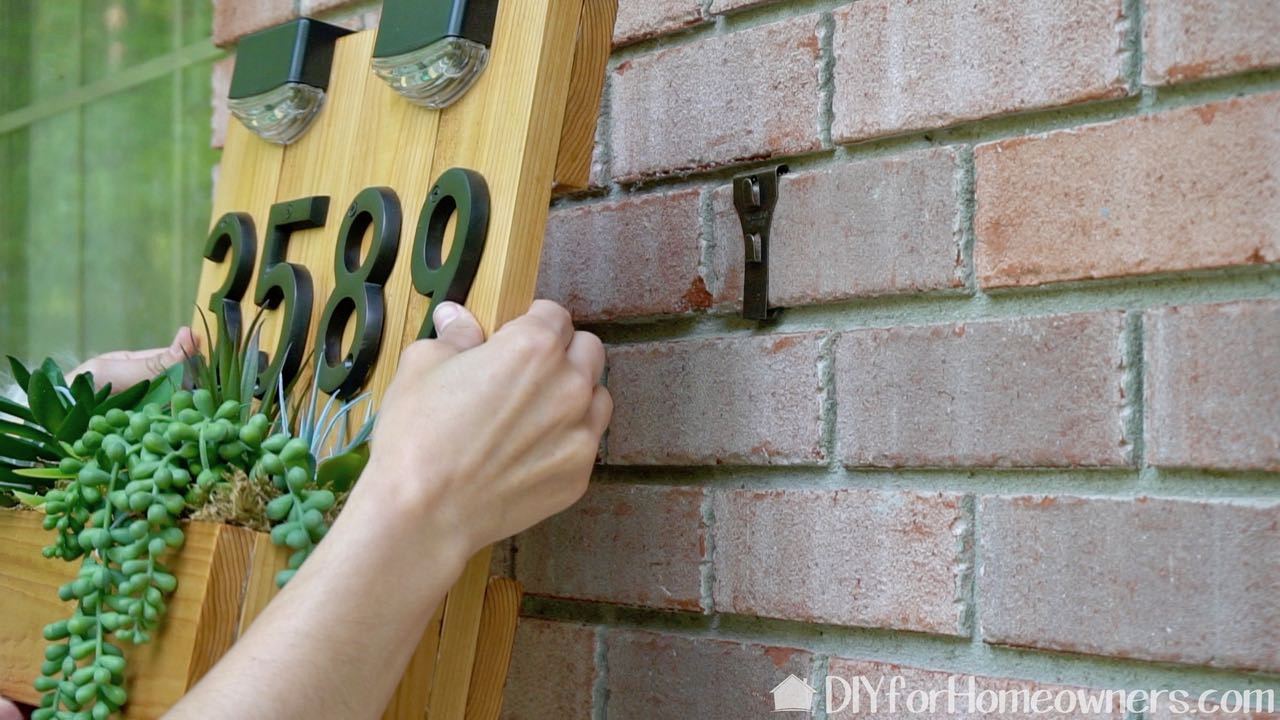
The directions say that you can just drill straight into brick if you own a brick house, but that seemed like an excessive amount of work to us. Instead, we used a nice piece of wood, cut it to size, and drilled all our template holes into that. The plan was: mount numbers onto wood, and then drill that wood into the brick. That way we only have to drill into the brick twice (one screw on each side) rather than three times per house number digit. We painted the wood with a few coats of the same outdoor-safe Extra White from Sherwin Williams that’s on our brick.
Once all your template holes are in, you fill the holes with caulk and then insert the numbers. Give it some time to dry, and your numbers should be sturdy enough to stand on their own. There are two ways to mount these numbers: flush or floating. It basically comes down to how deep you want to drill your holes. We wanted a floating look, but it also ended up being a lot easier. If we wanted flush, we would have had to get a thicker piece of wood. We had this piece already so it just sort of fit with our needs.
One thing we weren’t quite prepared for was how prominent the shadows were going to be with the floating installation. The fact that we’re doing black on Pure White probably isn’t helping anything, but on sunny days when the shadows are really intense, sometimes the numbers can be a little hard to read. It’s nothing that we’re really worried about, but it’s something you might want to consider.
All and all we are so happy with the way these turned out. There was no way they old numbers we had were going to be able to stay with our new paint: they were black and gold and looked good with the old color scheme. But with our updated grey and white, we felt like we needed something fresh and modern. These new numbers were a super cheap and relatively easy finishing touch on this big makeover.
Sorry, the comment form is closed at this time.